![]()

Transform Your Home Gym: Essential Interior Design Ideas For 2026
Building a home gym isn’t just about stacking equipment in a spare room. The right gym interior design shapes how you train, how long you stick with it, and whether you actually want to walk in there at 6 a.m. Whether you’re working with a finished basement, a corner of the garage, or a dedicated room, thoughtful interior design, from flooring and lighting to color and layout, turns a bare space into a place that keeps you motivated. This guide walks you through the essential elements of creating a modern gym interior design that’s functional, inspiring, and built to last.
Key Takeaways
- Thoughtful gym interior design with proper layout, flooring, and lighting increases workout motivation and consistency more than equipment quantity alone.
- Invest in quality flooring first—rubber mats or interlocking foam tiles ($300–$800 for a typical space) protect equipment, reduce noise, and cushion joint impact.
- Proper lighting at 40–50 foot-candles using LED panels mounted 8–10 feet high energizes your workouts and prevents injury from poor visibility.
- Use a neutral wall base with one bold accent color (red or navy) to boost energy for intense training while maintaining a professional, focused gym interior design.
- Secure storage solutions like wall-mounted dumbbell racks, labeled shelving, and rolling carts keep your space organized and prevent the clutter that derails long-term gym use.
- Mount full-length mirrors on studs or use heavy-duty adhesive to check lifting form and expand perceived space, but keep decorative elements minimal to avoid visual fatigue.
Plan Your Space Layout For Functionality And Flow
Start with a floor plan before buying anything. Measure your space in feet (width and length), note ceiling height, and identify fixed obstacles like posts, stairs, or HVAC runs. A typical cardio zone needs about 7 by 10 feet: free weights require more open floor for safety. Strength training stations and stretching areas should be separate enough that you’re not tangled in dumbbells while someone’s on the treadmill.
Traffic flow matters as much in a gym as in a kitchen. Create a clear path from the entrance to the most-used equipment, avoiding tight corners where you’ll clip your elbows. Position mirrors (covered later) where they help with form, not where they create visual chaos. Leave at least 2 feet of clearance around any cardio machine and 3 feet around free weights for safe movement and spotting. If you’re sharing the space with storage or laundry, use room dividers or paint to zone the areas visually. A small home gym doesn’t need a formal blueprint, but a rough sketch on graph paper takes 10 minutes and saves weeks of regret.
Flooring Solutions That Support Your Workout
Your current floor, concrete, tile, or plywood, isn’t ideal for lifting or cardio. Rubber mats or interlocking foam tiles protect equipment, reduce noise transmission to the floor below (a real concern in apartments and upper floors), and cushion joint impact during running or jumping.
Rubber flooring comes in rolls or tiles (typically 1/2-inch to 1-inch thick). Rolls are cheaper overall but harder to install without professional equipment. Tiles lock together and let you replace individual pieces if one gets damaged. A 10-by-12-foot area needs roughly 120 square feet of coverage: expect to spend $300–$800 depending on quality and thickness. Interlocking foam mats (EVA foam) are lighter and easier to install but wear faster under heavy dumbbells and don’t dampen sound as well. They work fine for yoga, Pilates, or light strength training.
Standard concrete basements can be sealed with epoxy first to prevent dust: gym flooring sits on top. If using tiles, ensure the subfloor is level, a slope or dip will telegraph through the mat and create tripping hazards. For a permanent installation, check local codes: some jurisdictions require underlayment for moisture barriers, especially on concrete slabs below grade. Ventilation underneath prevents mold and extends mat life.
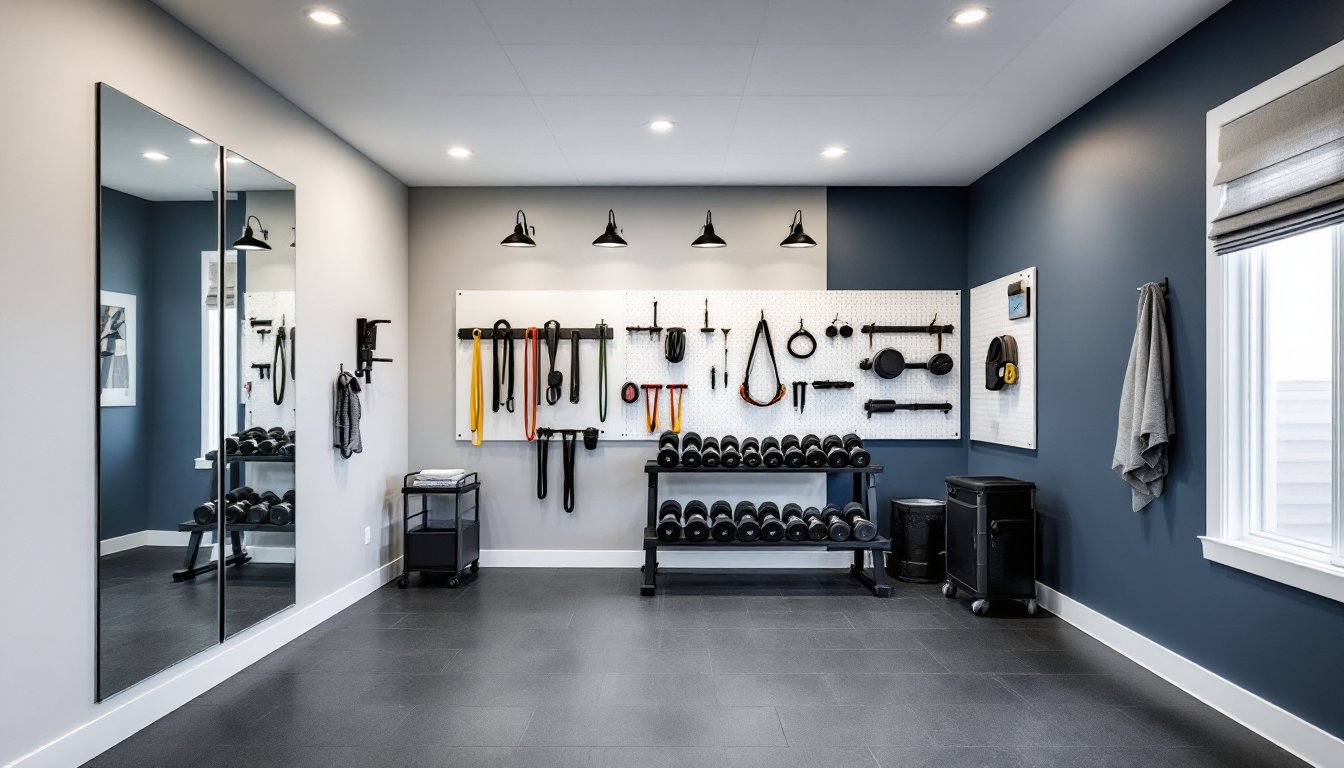
Lighting Design To Energize Your Workouts
Poor lighting drains motivation and invites injury. You need 40–50 foot-candles of illumination (roughly 40–50 lumens per square foot) for a functional workout space, brighter than typical living rooms but not as intense as a commercial gym.
Overhead LED panels (2-by-2 or 4-by-4 feet, typically 40–80 watts depending on brightness) are the workhorse. They distribute light evenly, run cool, and last 25,000+ hours. Mount them 8–10 feet above the floor if possible: too low creates shadows and feels claustrophobic. Recessed ceiling fixtures work if you have drop ceiling clearance: surface-mount panels are easier for drywall or unfinished ceilings.
Task lighting targets specific zones: adjustable clip lamps over free weights, strip lights along mirrors. A dimmer switch lets you dial down intensity for cool-down or recovery work. Avoid harsh fluorescent tubes, they flicker and look institutional. Natural daylight is a bonus: if your space has windows, face cardio equipment toward them and use blackout shades to control glare on screens. Color temperature matters too: 4000K (neutral white) energizes without the harsh blue of 6500K daylight bulbs. Total fixture cost for a 12-by-15-foot room runs $400–$1,000 before installation.
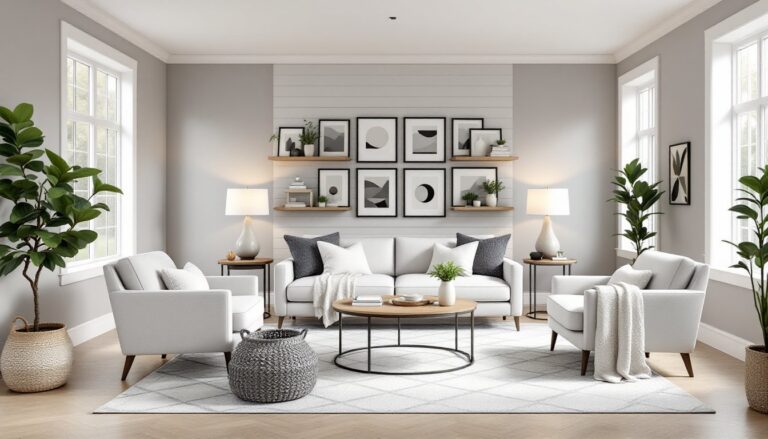
Color Schemes That Motivate And Inspire
Color psychology is real. Reds and oranges rev up energy for intense lifting or sprints. Blues and greens calm the nervous system, ideal for recovery or stretching. Most successful home gyms use a neutral base (gray, white, or light beige walls) with bold accent colors on one wall or trim.
A single accent wall painted deep red or navy (one wall takes one gallon of paint for a typical room, costing $30–$60) creates visual interest without overwhelming a small space. Trim in contrasting colors, say, black or dark gray on white walls, defines edges and adds modern gym interior design polish. If you’re renting and can’t paint, removable peel-and-stick wallpaper or fabric panels achieve the same effect.
Floor color should be practical: darker rubber or foam hides dust and sweat marks better than light colors. Wall color reflects light, so whites and pale grays brighten dim basements: darker colors require more artificial lighting. Avoid neon or overly bright accent colors that exhaust the eyes during long cardio sessions. Two or three colors maximum keeps the space focused and professional-looking rather than chaotic.
Storage And Organization For Equipment
A cluttered gym is a gym nobody uses. Before designing storage, audit what you own: dumbbells, resistance bands, mats, straps, water bottles, towels, supplements. Group similar items and measure them.
Dumbbell racks come as wall-mounted (saves floor space but requires solid studs and proper anchoring, 8d nails or 1/2-inch lag bolts rated for 50+ pounds each) or freestanding (more flexible, no installation). A rack holding 10 pairs takes up 3–4 square feet of floor. Wall shelving (1-inch solid wood or quality plywood on 16-inch-on-center stud brackets) holds lighter gear: towels, bands, foam rollers. Pegboard (1/4-inch hardboard mounted on cleats 4 inches from the wall) accepts hooks for jump ropes, wraps, and small accessories. Paint pegboard to match your accent color for a cleaner look.
Label everything with durable, weather-resistant labels (not hand-written). Rolling carts with rubber feet hide clutter quickly and move around the space without scratching floors. A small shelving unit (18-24 inches deep, 36-48 inches wide) takes up a corner and organizes supplies. Most DIYers install shelving without professional help: use a level, locate studs with a stud finder, and don’t skimp on anchors. Overcrowded racks and shelves look chaotic: leave breathing room.
Adding Mirrors And Motivational Décor
Mirrors serve a purpose: checking form during lifts and cardio, and they expand the perceived space. Mount full-length mirrors (72–84 inches tall) on at least one wall where you can see your entire body during compound movements. Use safety-backed mirror or acrylic to prevent shattering. Secure mirrors to studs or use heavy-duty mirror adhesive rated for wall weight: sloppy installation risks a dangerous fall. A 4-by-8-foot mirror costs $150–$400 installed professionally: DIY adhesive mounting is cheaper but requires a perfectly clean, dry, flat surface and patience while the adhesive sets (24 hours).
Motivational posters, whiteboards tracking progress, or a cork board for goals add personality without clutter. Keep décor minimal, a gym is a tool, not a shrine. One or two statement pieces (a bold motivational quote, a pull-up bar with custom paint) work: covering the walls exhausts the eye. If you’re exploring current design trends, interior design trends shape what feels fresh and intentional versus dated. A whiteboard for recording PRs (personal records) or workouts keeps you accountable without expensive tracking apps.
Bringing It All Together: Your Gym Interior
A well-designed home gym comes together when layout, flooring, lighting, color, storage, and mirrors all work toward one goal: keeping you training. Start by sketching your space, identifying your zone needs, and investing in flooring and lighting first, these are the foundation. Color and mirrors refine the vibe once the bones are set.
Consider consulting design references: top interior design apps can help visualize layouts before you commit, and browsing curated design galleries on sites like Homedit and MyDomaine shows real examples of creative gym interior design in action. Your home gym doesn’t need to look like a commercial facility: it needs to work for your body, your schedule, and your motivation. Modern gym interior design principles, clean lines, purposeful color, organized storage, and good lighting, apply equally to a basement corner and a dedicated room.
Take your time with prep: measure twice, buy the right flooring and mats, install lighting where it counts, and resist impulse decor purchases. A $2,000 gym built thoughtfully outperforms a $5,000 gym cobbled together haphazardly. Start small, add equipment as you progress, and refine the space as you learn what works. Your design is never truly “finished”, it evolves with your training goals.