![]()

Interior Ceiling Design Ideas That Transform Your Home in 2026
Most homeowners focus on what’s at eye level, walls, flooring, furniture, and overlook the fifth wall looming above their heads. Your ceiling covers roughly 10% of your room’s visible surface, yet it sets the tone for everything below it. A well-designed interior ceiling can make a room feel taller, cozier, more sophisticated, or dramatically different without touching a single wall. Whether you’re refreshing a single room or planning a whole-home update, ceiling design deserves serious consideration. This guide walks through practical ceiling styles, lighting strategies, and DIY-friendly projects that won’t break your budget or require a professional contractor.
Key Takeaways
- Interior ceiling design covering just 10% of visible surface area sets the tone for entire rooms and can make spaces feel taller, cozier, or more sophisticated without changing walls or furniture.
- Popular ceiling styles like coffered ceilings, tray ceilings, and shiplap offer distinct visual benefits ranging from $800–$3,000 for professional installation, while simpler finishes like knockdown texture cost $0.50–$2 per square foot.
- Lighting strategy is inseparable from ceiling design—layering ambient, task, and accent light transforms flat ceilings and highlights architectural details through recessed lighting, pendants, and strategic uplighting.
- Beginner homeowners can tackle painting and simple texture application in 4–6 hours with basic tools, while intermediate projects like crown molding and advanced work like coffered grids require professional help to avoid code violations and safety risks.
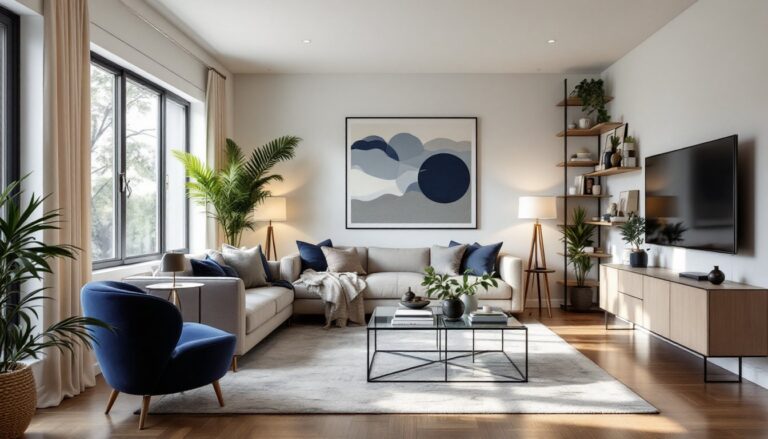
- Strategic color choices, from light gray to darker finishes like navy or charcoal, enhance visual interest and perceived ceiling height, working best when paired with intentional lighting placement to avoid flat, institutional appearances.
Why Your Ceiling Deserves Design Attention
A ceiling isn’t just the last thing you paint before moving on. It’s a defining feature that influences how light moves through a room, how tall or spacious the space feels, and whether the room looks polished or unfinished.
Consider light reflection. A flat white ceiling bounces light evenly and suits modern minimalism. A darker or textured ceiling absorbs light and creates intimacy, great for libraries or bedrooms. A reflective surface pulls focus upward and makes eight-foot ceilings feel closer to nine.
You can also use ceiling design to disguise imperfections. Popcorn texture hides old water stains and uneven drywall, though today’s homeowners lean toward smoother, cleaner finishes. Exposed beams draw the eye along structural lines and add character that sheetrock alone can’t deliver.
Structural elements matter too. Load-bearing components dictate what you can modify, so always verify wall and ceiling framing before planning major changes. When in doubt, consult a contractor. Simple cosmetic updates, paint, new trim, or recessed lighting, don’t typically require permits, but dropped ceilings or extensive beam work do.
Popular Ceiling Styles and Finishes for Modern Homes
Modern ceiling design pulls from both classic and contemporary playbooks. Here’s what’s working right now.
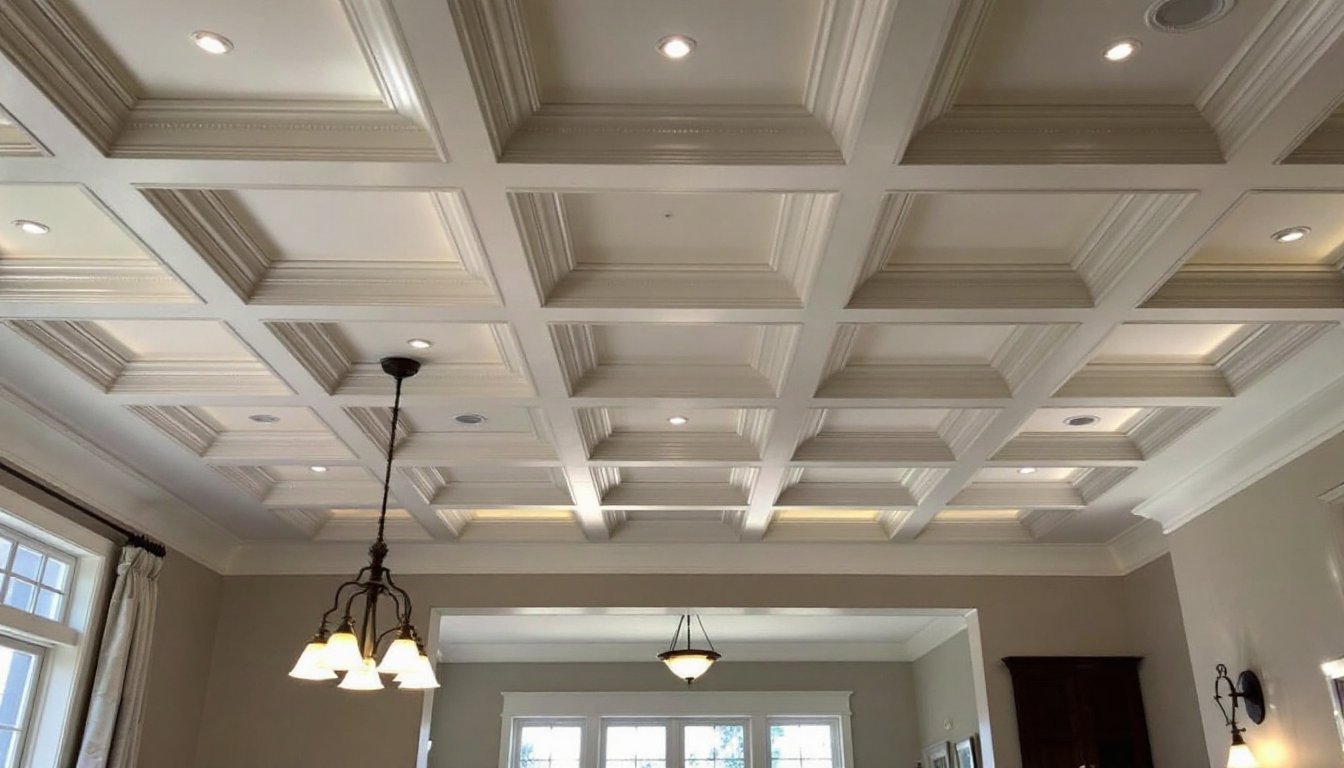
Coffered and Tray Ceilings
A coffered ceiling features a grid of recessed panels, think a grid of square or rectangular sunken boxes. It adds shadow lines and architectural depth without being too bold. A tray ceiling (or stepped ceiling) drops around the room’s perimeter and rises again toward the center, framing the room like a shadow line made dimensional.
Both create visual interest and suggest craftsman-level quality. Coffered ceilings suit traditional, transitional, and even industrial spaces. Tray ceilings feel more contemporary and help taller walls seem more proportional.
DIY coffered ceilings are possible if you’re comfortable framing and finishing drywall. Standard grid spacing is 12 to 16 inches, and paint colors, contrasting the grid boxes or keeping them monochrome, set the mood. Professional installation runs $800–$3,000 per 100 square feet, depending on detail and finish. Permit requirements vary by jurisdiction: check with your local building department.
Tray ceilings demand framing and drywall work beyond beginner scope, so hire a contractor unless you’ve tackled soffit construction before.
Textured and Shiplap Options
Shiplap, solid wood planks with overlapping edges, brings farmhouse warmth and modern cabin vibes. Install it horizontally for a calming effect or vertically to emphasize height. Shiplap runs $1–$4 per linear foot before finishing, and a 12-by-14-foot bedroom might use 150–200 linear feet.
Textured finishes like knockdown or light popcorn are easier to install and maintain than smooth drywall. A knockdown finish looks like drywall mud applied with a trowel, creating subtle shadows. It hides imperfections, accepts paint in any color, and costs $0.50–$2 per square foot for professional application.
Smooth, painted ceilings remain classic for reason: clean, flexible, and forgiving. A coat of primer followed by two topcoats of ceiling paint keeps costs low, about $2–$5 per gallon, covering 300–400 square feet. Use a roller and extension pole: brushing a ceiling is slow and leaves visible stroke marks.
Top Interior Design Apps can help you visualize colors and layouts before committing to paint.
Lighting and Texture: Elevating Your Ceiling Design
Lighting is inseparable from ceiling design. A flat white ceiling with poor lighting feels institutional: add warm recessed lights or a statement fixture, and it becomes intentional.
Recessed lighting (also called can lights) sits flush in the ceiling and delivers clean, modern aesthetics. Space them 4 to 6 feet apart for even coverage: 60-watt equivalent LEDs are standard and run about $15–$30 per fixture installed. Dimmers let you adjust mood, bright for kitchen tasks, dim for evening relaxation. Dimmer installation requires understanding your local electrical code (NEC, or National Electrical Code), so hire a licensed electrician unless you’re proficient with wiring.
Surface-mount fixtures, pendant lights, chandeliers, semi-flushes, add personality. Hang pendants 12 to 18 inches below an eight-foot ceiling: lower in rooms with higher ceilings. A three-pendant kitchen island grouping costs $100–$500 and transforms the space.
Exposed ceiling details amplify with the right light. A beam structure with uplighting creates shadows and depth. A white ceiling with angled spotlights emphasizes architectural lines.
According to interior design inspiration from House Beautiful, layering light, ambient (overhead), task (under-cabinet), and accent (uplighting beams or artwork), makes rooms function better and feel more designed.
Texture pairs brilliantly with intentional lighting. Shiplap catches and breaks light across each plank: knockdown texture creates micro-shadows. Smooth ceilings? They reflect light uniformly, so pair them with well-placed fixtures to avoid a flat, washed-out appearance.
Color matters too. A light gray ceiling feels more interesting than white while staying neutral. Benjamin Moore’s White Dove or Sherwin-Williams’ Pure White are popular choices. Darker ceilings (charcoal, navy, forest green) work in rooms with adequate light and generous ceiling height.
DIY Ceiling Projects for Every Skill Level
Not every ceiling update requires professional help. Here are projects matched to skill levels.
Beginner: Painting and Simple Texture
Painting a ceiling is straightforward but physically demanding. You’ll need:
• Extension pole and roller (9-inch roller covers faster than a smaller one)
• Primer and two coats of ceiling paint (matte finish hides imperfections)
• Plastic sheeting to protect flooring and furniture
• Safety glasses and a dust mask (drywall dust and paint mist irritate eyes and lungs)
• Drop cloths (old sheets work, but canvas drop cloths prevent spills from seeping through)
Seal cut edges with painter’s tape. Apply primer first, it improves paint adhesion and covers stains. Two topcoats ensure even coverage. Budget 4–6 hours for a 200-square-foot bedroom.
Applying knockdown texture requires a texture spray gun (rental, $20–$40/day) and joint compound mixed to the right consistency. Watch tutorials online before attempting: overshooting texture is easy to spot and hard to fix.
Intermediate: Recessed Lighting and Trim
Adding recessed lights demands cutting holes in the ceiling and running electrical. You can DIY the demolition and patching, but hire a licensed electrician for wiring and connections, electrical work violates code if unpermitted and creates fire hazards.
Addressing crown molding or trim is more approachable. You’ll need:
• Miter saw or circular saw (a miter saw delivers cleaner 45-degree angle cuts)
• Coping saw for inside corners
• Level and stud finder to locate framing for nail placement
• Brad nailer or 2.5-inch finish nails to secure trim
• Caulk and paintable sealant to hide gaps
• Hearing and eye protection (saws are loud and fling debris)
Measure twice: cut once. Crown molding sits at an angle, so test-fit first. A single-room perimeter of trim takes a handy person 3–5 hours including caulking and primer.
Advanced: Coffered Ceiling Grid
Building a coffered ceiling grid means framing and drywall finishing, suitable for experienced DIYers. You’ll run perpendicular framing (typically 2-by-4 lumber) perpendicular to existing joists, space them evenly, drywall over, and finish with joint compound and paint.
Plan the grid beforehand. Typical spacing is 12 or 16 inches on-center. Account for structural support, verify no obstacles (ducts, wiring, piping) above the ceiling, and check local codes for load ratings.
Shiplap installation is moderately difficult. You’ll need:
• Shiplap boards (1-by-6 or 1-by-8 is standard)
• Stud finder to locate framing every 12–16 inches
• Brad nailer (faster than hand-nailing)
• Circular saw or table saw for angle cuts around corners
• Level (use every few boards to stay straight)
• Safety glasses (wood chips fly)
Prime and paint before or after installation: many prefer priming raw wood off-site. Plan 40–80 hours for a 12-by-14-foot ceiling as a first-timer.
If you’re uncertain about framing, permits, or electrical work, hire professionals. A contractor mistake costs far more than upfront labor.
Conclusion
Your ceiling is prime real estate for transforming a room’s character and function. Whether you’re choosing paint color, adding recessed lighting, installing shiplap, or designing a coffered grid, you’re making a design investment that affects how the space looks and feels daily.
Start simple, fresh paint and a dimmer-ready fixture, and build from there. Check Freshome’s collection of design inspiration and interior design resources for ideas before committing. Prep work and careful planning prevent costly mistakes. And remember: your ceiling deserves as much thoughtfulness as your walls and floors. When you get it right, the room transforms completely.