![]()

Interior Wooden Wall Design: 5 Stunning Styles to Transform Any Room in 2026
Wooden walls are no longer reserved for log cabins or rustic retreats. In 2026, interior wooden wall design has evolved into a sophisticated home improvement trend that works across modern, farmhouse, minimalist, and transitional spaces. Whether you’re looking to add warmth to a bedroom, create a statement feature in your living room, or refinish an existing wall, wood brings texture, visual interest, and genuine coziness that drywall simply can’t match. The good news? Many wooden wall projects are entirely DIY-friendly if you understand material selection, proper installation, and finishing techniques. Let’s walk through the styles, materials, and methods that’ll help you get this right.
Key Takeaways
- Interior wooden wall design ranges from budget-friendly pine shiplap ($1–$3 per square foot) to premium reclaimed wood ($5–$15+ per square foot), offering flexibility for any budget and timeline.
- Proper surface preparation, including moisture acclimation for 48 hours and locating studs, is essential to prevent warping, cupping, and installation failures.
- Accent walls and feature panels provide a low-commitment way to experiment with wooden wall designs before undertaking full-wall projects.
- Wood species selection—pine, cedar, or hardwood—determines durability and maintenance, with cedar being ideal for high-humidity areas like bathrooms.
- Small gaps (1/16 inch) between boards and staggered end joints are critical for wood movement, preventing buckling and ensuring long-term wall integrity.
- Post-installation finishing with sanding, staining, and polyurethane sealing protects the wooden wall investment and enhances its aesthetic appeal for 5–10 years.
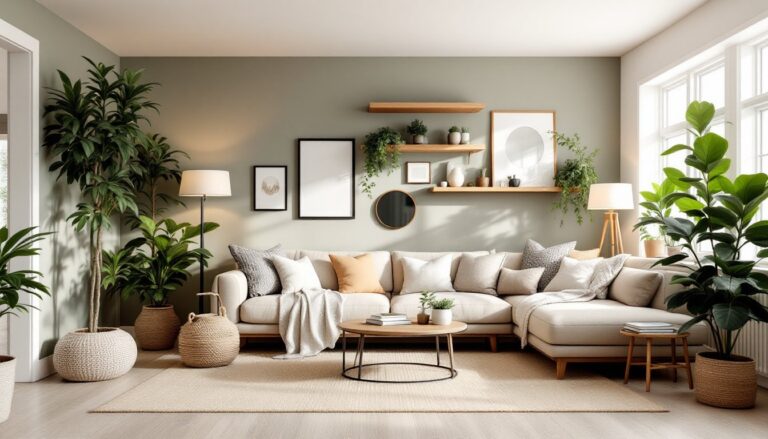
Why Wooden Walls Are Making a Comeback
Wooden walls appeal to homeowners for practical and aesthetic reasons. They dampen sound better than bare drywall, regulate humidity slightly, and create a finished look that actually improves with age and patina. Trendy interior design platforms showcase everything from sustainable reclaimed wood to engineered planking, and the variety of wood species, stains, and finishes means you’re not locked into one look.
From a design standpoint, wood introduces warmth and organic variation that paint alone can’t deliver. A single wood accent wall can anchor an entire room’s color palette. Cost-wise, wooden wall treatments range from budget-friendly pine shiplap (around $1–$3 per square foot installed) to higher-end reclaimed barn wood ($5–$15+ per square foot), giving you real flexibility depending on your timeline and budget.
Building codes treat most interior wooden wall finishes as cosmetic, so you typically won’t need permits for a simple shiplap or board-and-batten project in most jurisdictions. That said, always confirm local requirements before starting. Fire-rated finishes may be required in certain room types or jurisdictions, check with your local building department.
Popular Wooden Wall Design Styles
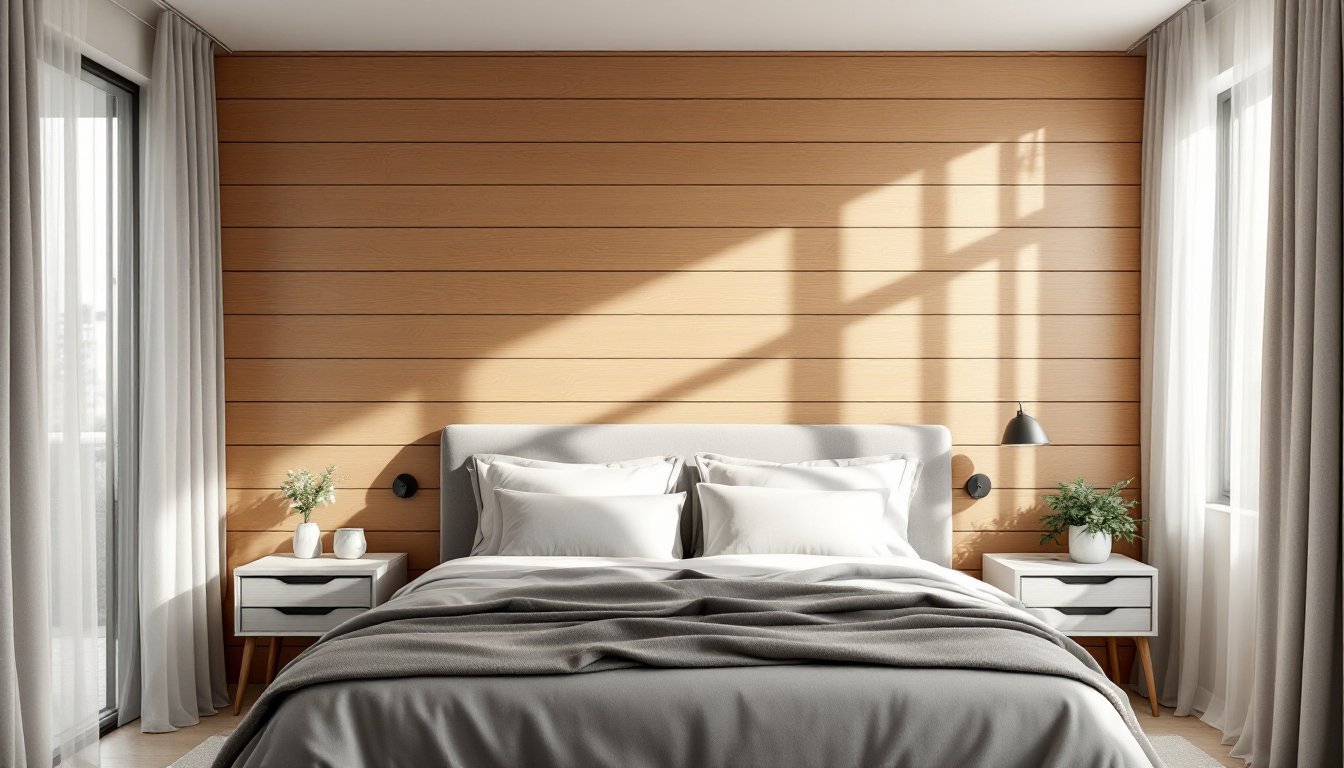
Shiplap and Planking
Shiplap consists of horizontal boards (typically 1 × 6 or 1 × 8 nominal lumber) with rabbeted or overlapped edges that create a clean, unified look. The interlocking profile hides fasteners and allows for wood movement as humidity changes, crucial in climates with seasonal swings. Pine is the standard budget choice: cedar and hardwoods cost more but resist rot better.
When planning a shiplap wall, measure twice and account for wood shrinkage. Nominal 1 × 6 lumber is actually 3/4″ thick and 5.5″ wide. Start from the bottom and work upward, staggering joints and fastening to studs with trim screws or finish nails. You’ll typically space fasteners every 16 inches along the stud. Budget 2–3 days for a 150-square-foot wall (prep, installation, and sanding).
Planking, wider, thicker boards, creates a bolder visual statement and works well in modern or transitional spaces. Wider boards mean fewer seams and a roomier feel. Hardwood planks run higher in cost but deliver premium aesthetics. Shiplap and planking both require sanding, staining, and sealing, which adds time but gives you control over the final color and sheen.
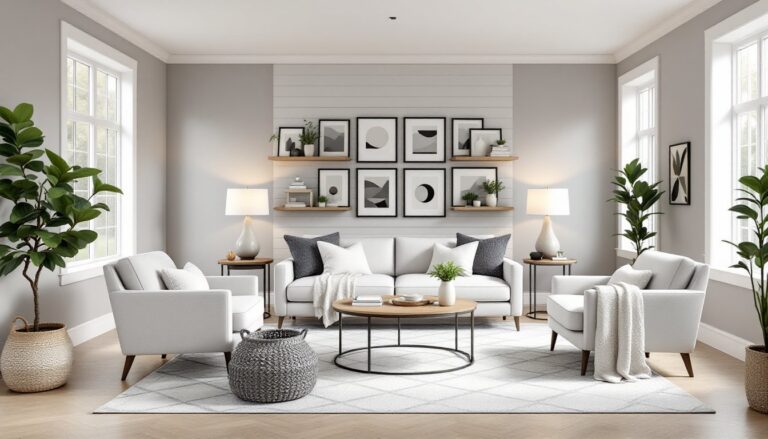
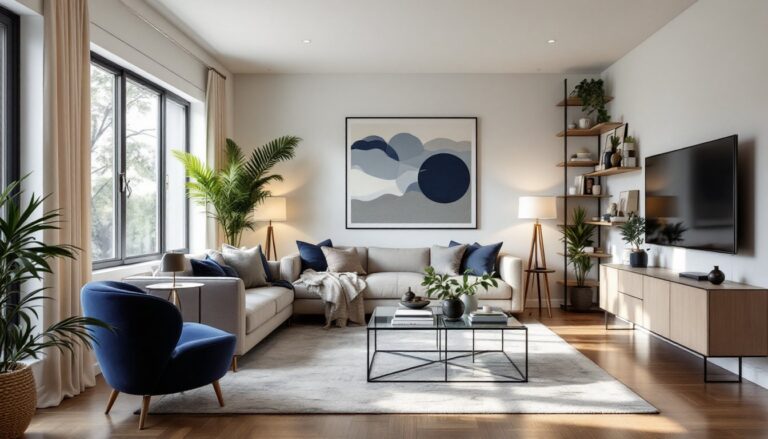
Accent Walls and Feature Panels
You don’t have to cover all four walls. A single wooden accent wall behind a bed, sofa, or fireplace creates focal-point drama. Accent walls let you experiment with darker stains or wider planks without overwhelming a room.
Feature panels, small, geometric wooden wall sections, are a growing trend. Think a 4 × 4-foot herringbone or chevron pattern in the entryway, or a simple rectangular frame around a bathroom vanity. These panels use less material and time than full walls, making them ideal for testing your skills before committing to larger projects.
For feature panels, sketch the design, locate and mark studs, and consider adding a backing layer (1/4″ plywood) to ensure a solid mounting surface. Use construction adhesive and finish nails for a secure, seamless look. This approach works especially well when paired with mastering interior design presentation boards concepts, visualizing your wall design in scale first prevents costly mistakes.
Materials and Wood Selection
Wood type determines durability, appearance, and maintenance. Pine and fir are affordable, work well for stained finishes, and take paint nicely. Softwoods are prone to denting, so handle and install carefully. Cedar resists moisture and insects naturally: it’s ideal for bathrooms and high-humidity areas. Hardwoods (oak, maple, walnut) cost significantly more but deliver heirloom quality and richer color variation.
Decide between solid wood and engineered products. Solid shiplap runs $1–$8 per board depending on species. Engineered wood planks (real wood veneer over plywood) cost less and move less with humidity changes, a practical choice for unstable climates. Reclaimed or antique-finish wood adds character but requires inspection for nails, rot, or pest damage before installation.
Measure your wall footage carefully. A 150-square-foot wall with 5.5″-wide shiplap requires roughly 330 linear feet of material, plus 10–15% waste for cuts and defects. Order slightly extra: color and grain variation batch-to-batch is normal, and having spares prevents mid-project scrambling.
Surface preparation is non-negotiable. Remove existing baseboards, outlet covers, and light fixtures. Patch any wall damage with joint compound, sand smooth, and prime. Moisture meters are worth the $20–$40 investment, wood should acclimate to your home’s humidity for 48 hours before installation. Mismatched moisture content causes cupping, warping, and sealing failures. Modern design trends increasingly feature wood walls as seen on sites like Decoist, where sustainability and material sourcing are equally emphasized as aesthetics.
Installation Tips for DIY Success
Safety first. Wear safety glasses and dust masks when cutting or sanding. If you’re working at ceiling height, use a stable ladder or scaffolding, never overreach. Ear protection is smart if you’re using power tools for hours.
Start with a level baseline. Snap a chalk line at the bottom of your wall, then fasten a temporary wooden ledger strip (1 × 2 board) along that line. This prevents the first row from creeping down and keeps everything square. Locate all studs (typically 16 inches on center in most homes) and mark them with pencil.
- Cut and lay out the first row of boards end-to-end along the ledger, accounting for corners and obstacles. Pre-drill holes to prevent splitting, then secure with 2.5-inch trim screws (stronger than finish nails and easier to remove if you error). Fasteners should hit studs or use wall anchors if mounting between studs.
- Install row by row, checking level every 2–3 rows. Stagger end joints so no two seams line up vertically, it looks cleaner and distributes stress evenly.
- Cut around obstacles (outlets, switches, baseboards) with a jigsaw or circular saw. A miter saw makes angle cuts crisp if you’re incorporating beveled edges or trim pieces.
- Leave small gaps (1/16 inch) between boards to allow wood movement. Completely tight joints cause warping and buckling over time.
- Finish the top edge with trim or a cap board nailed to the top plate or crown molding, depending on your design.
Most DIYers can install shiplap at roughly 100–150 square feet per day working solo. A second pair of hands significantly speeds up the process, especially on tall walls or ceiling installations. If you’re uncertain about load-bearing walls, structural fastening, or concealing utilities, consult a licensed contractor, framing mistakes can compromise wall integrity and create fire or electrical hazards.
Maintenance and Finishing Touches
Once installed, sand the wall smooth with 120- to 150-grit sandpaper, breaking dust regularly. Vacuum thoroughly before staining to prevent particles from embedding in the finish.
Staining is optional but enhances wood grain and character. Test stain samples on scrap pieces under your room’s lighting, colors shift dramatically in different light. One coat of stain typically requires 4–8 hours to dry: apply a second coat if desired. Sealing protects against moisture and staining. Polyurethane (matte, satin, or gloss) is the standard choice for interior walls: it dries in 24 hours and handles humidity well. Water-based polyurethane dries faster and has less odor than oil-based versions. Plan for 1–2 coats depending on traffic and exposure.
For painted wood walls, prime with a bonding primer rated for wood, then apply two coats of quality paint. Semi-gloss or satin finishes are easier to clean than flat finishes, useful in kitchens and bathrooms. One gallon covers roughly 300–400 square feet.
Long-term maintenance is minimal. Dust periodically with a soft cloth. Wipe spills immediately, especially near kitchens or bathrooms, to prevent water stains. Recoat polyurethane every 5–10 years in high-traffic areas. Hardwood and cedar develop a beautiful patina over time: if you love the weathered look, embrace it. For inspiration on finishing and styling, resources like Homedit and Freshome showcase real-world installations and color combinations that work across design genres. You can also explore interior wooden wall design categories and broader Top Interior Design Apps for iPad tools to visualize your finished project before committing.